Getting Started
The Basics
Advanced Topics
Mobile App Links
![]()
Creating Your First Project
There are a few ways to create a new project in Wecde. These include:
Create New Project
To create a new project from a list of predefined templates, go to the Projects tab menu, click the + Icon and select New Project.
List of frameworks currently available:
JavaScript
- Angular
- AngularJS
- React
- D3
- Vue
CSS
- Bootstrap
- Bulma
- Material Design Lite
- Semantic UI
- UIkit
Cloning a Git Repo
From the Projects tab menu, click on the GIT icon and select Clone Repo. This will bring up the GIT clone modal. Enter in a GIT repo HTTPS URL and click OK to begin cloning. For more information on GIT cloning, please visit the GIT Guide
Import a ZIP file
Simple ZIP files can be imported into Wecde. ZIP Archives offer a way to archive and export/import projects that does not rely on GIT. Archives offer a simple way to share small projects. To import a ZIP archive, follow the steps below:
Open the Projects menu tab, click on the + icon and select Import ZIP.
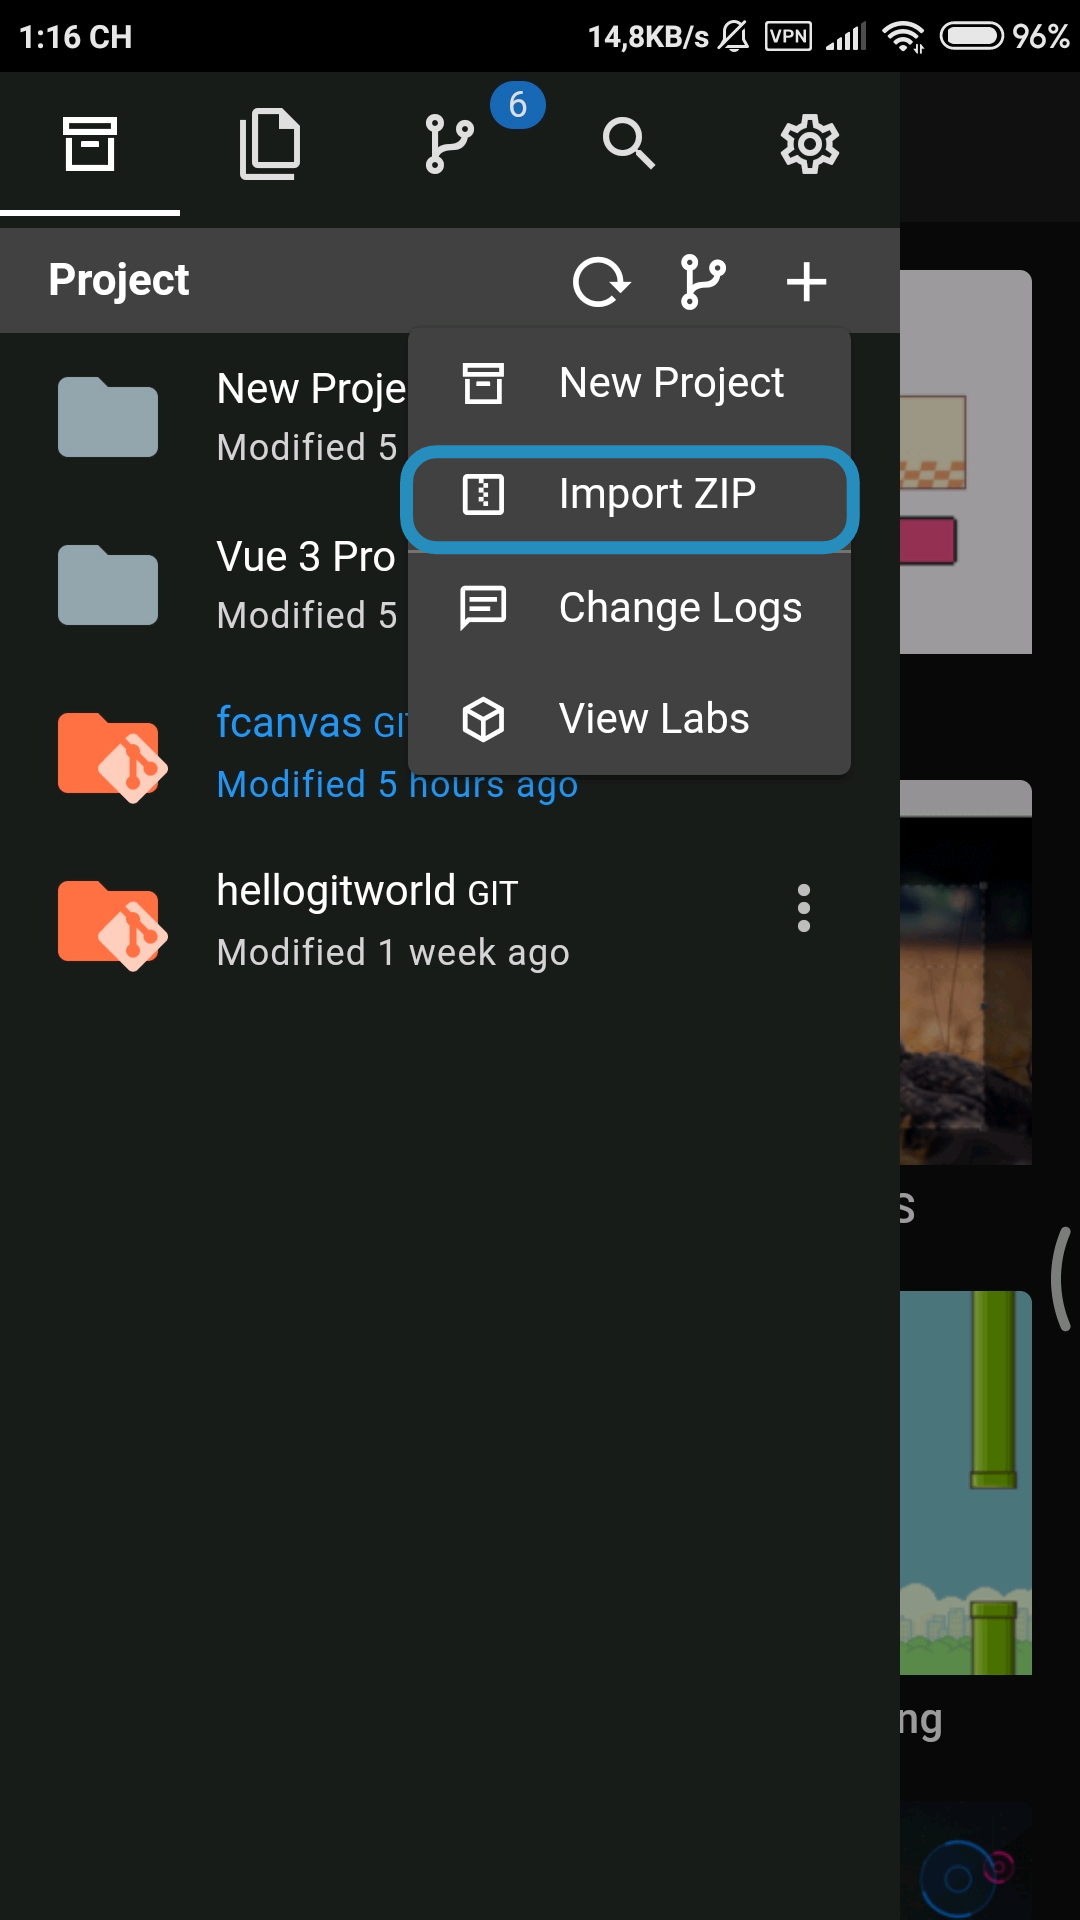
This should open up a system dialog to select a ZIP file depending on what system you are using. Select a ZIP file to import. Note: ZIP files do not store file encodings in the archive, it is assume that the file encoding is UTF-8, which might not be the case if the ZIP file was generated on an older Windows computer or using external tools. There is no way for the editor to detect what encoding the ZIP file is using, so other encodings may result in data corruption or an import error.
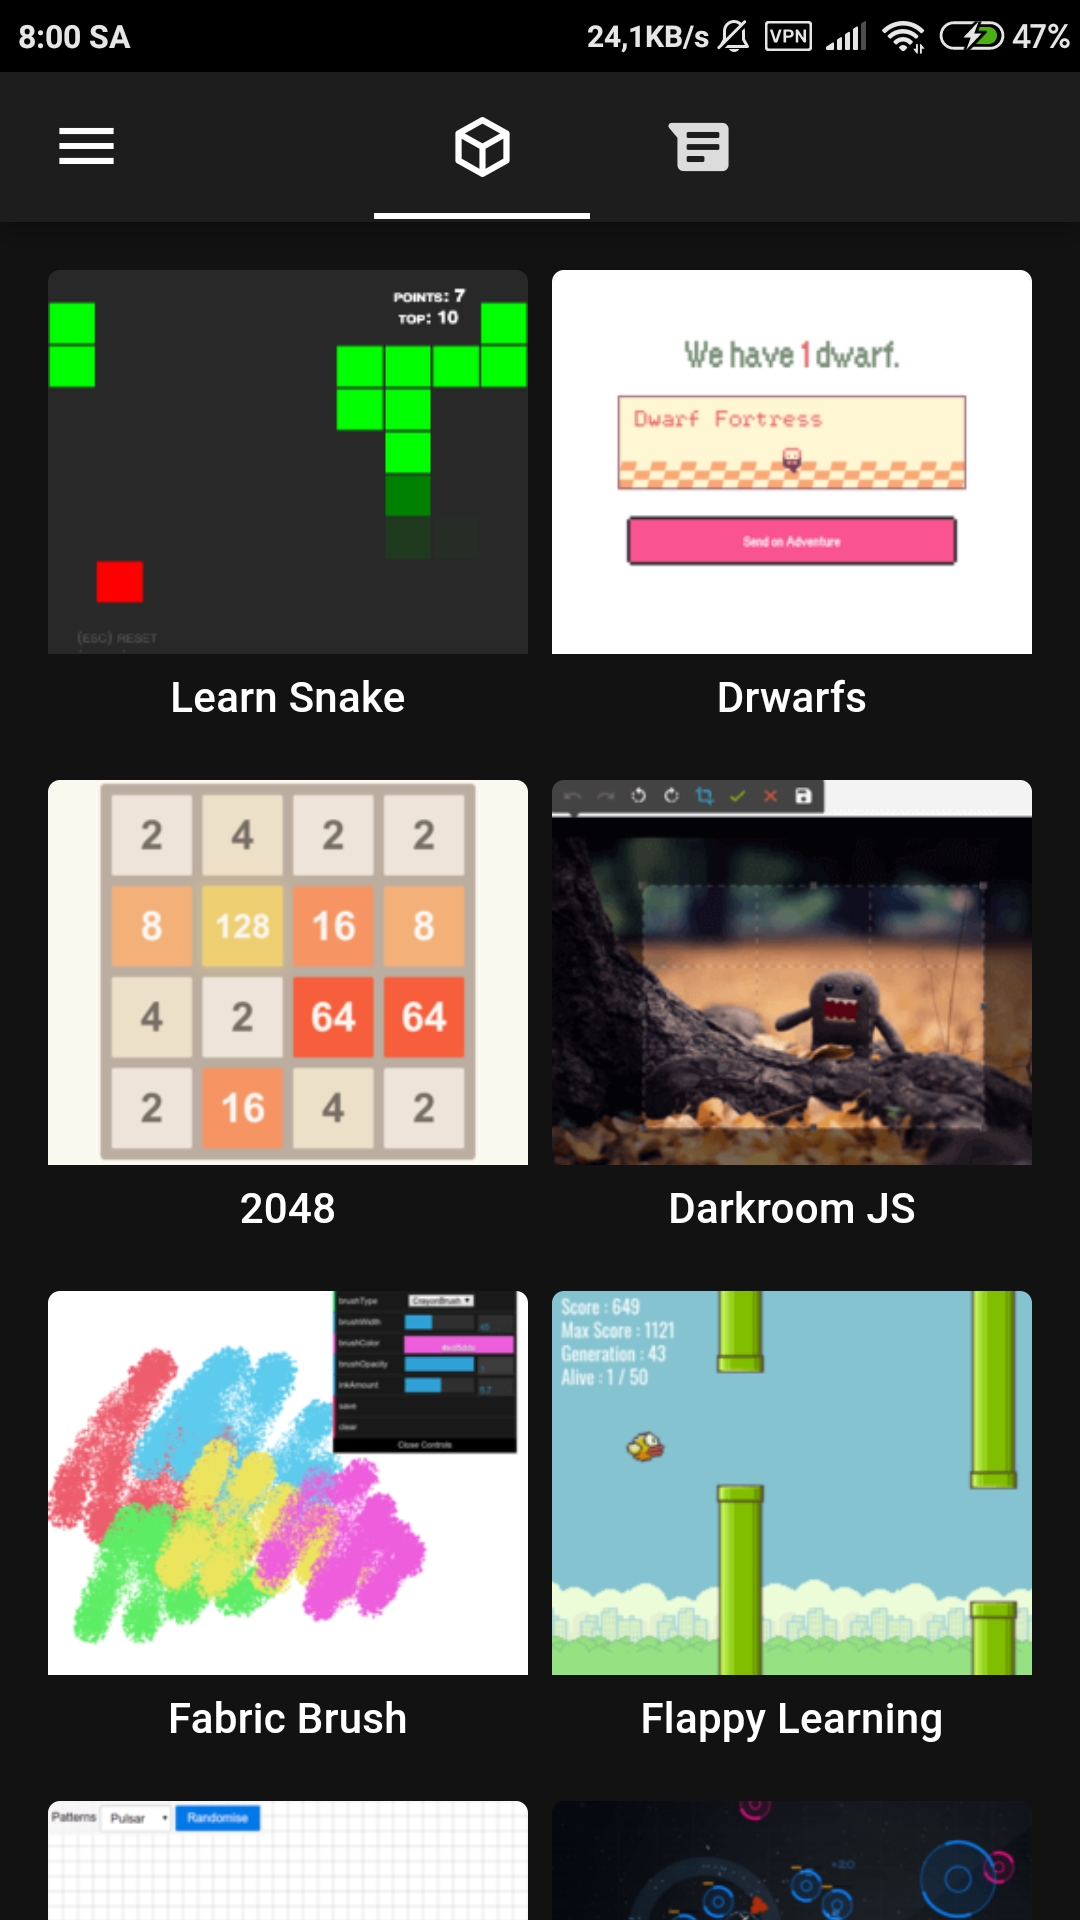
Creating a Lab
Labs offer a neat way to learn from other projects created by other devs and programmers. There are labs using D3, Three.js that range from simple games to machine learning demos. To create a lab, follow the steps below.
Open the Projects menu tab, click the + icon, and select View Labs. This will bring you to the Labs gallery page where you can choose from all of the labs available.
Click on any lab to create a project that duplicates the code as a local project.
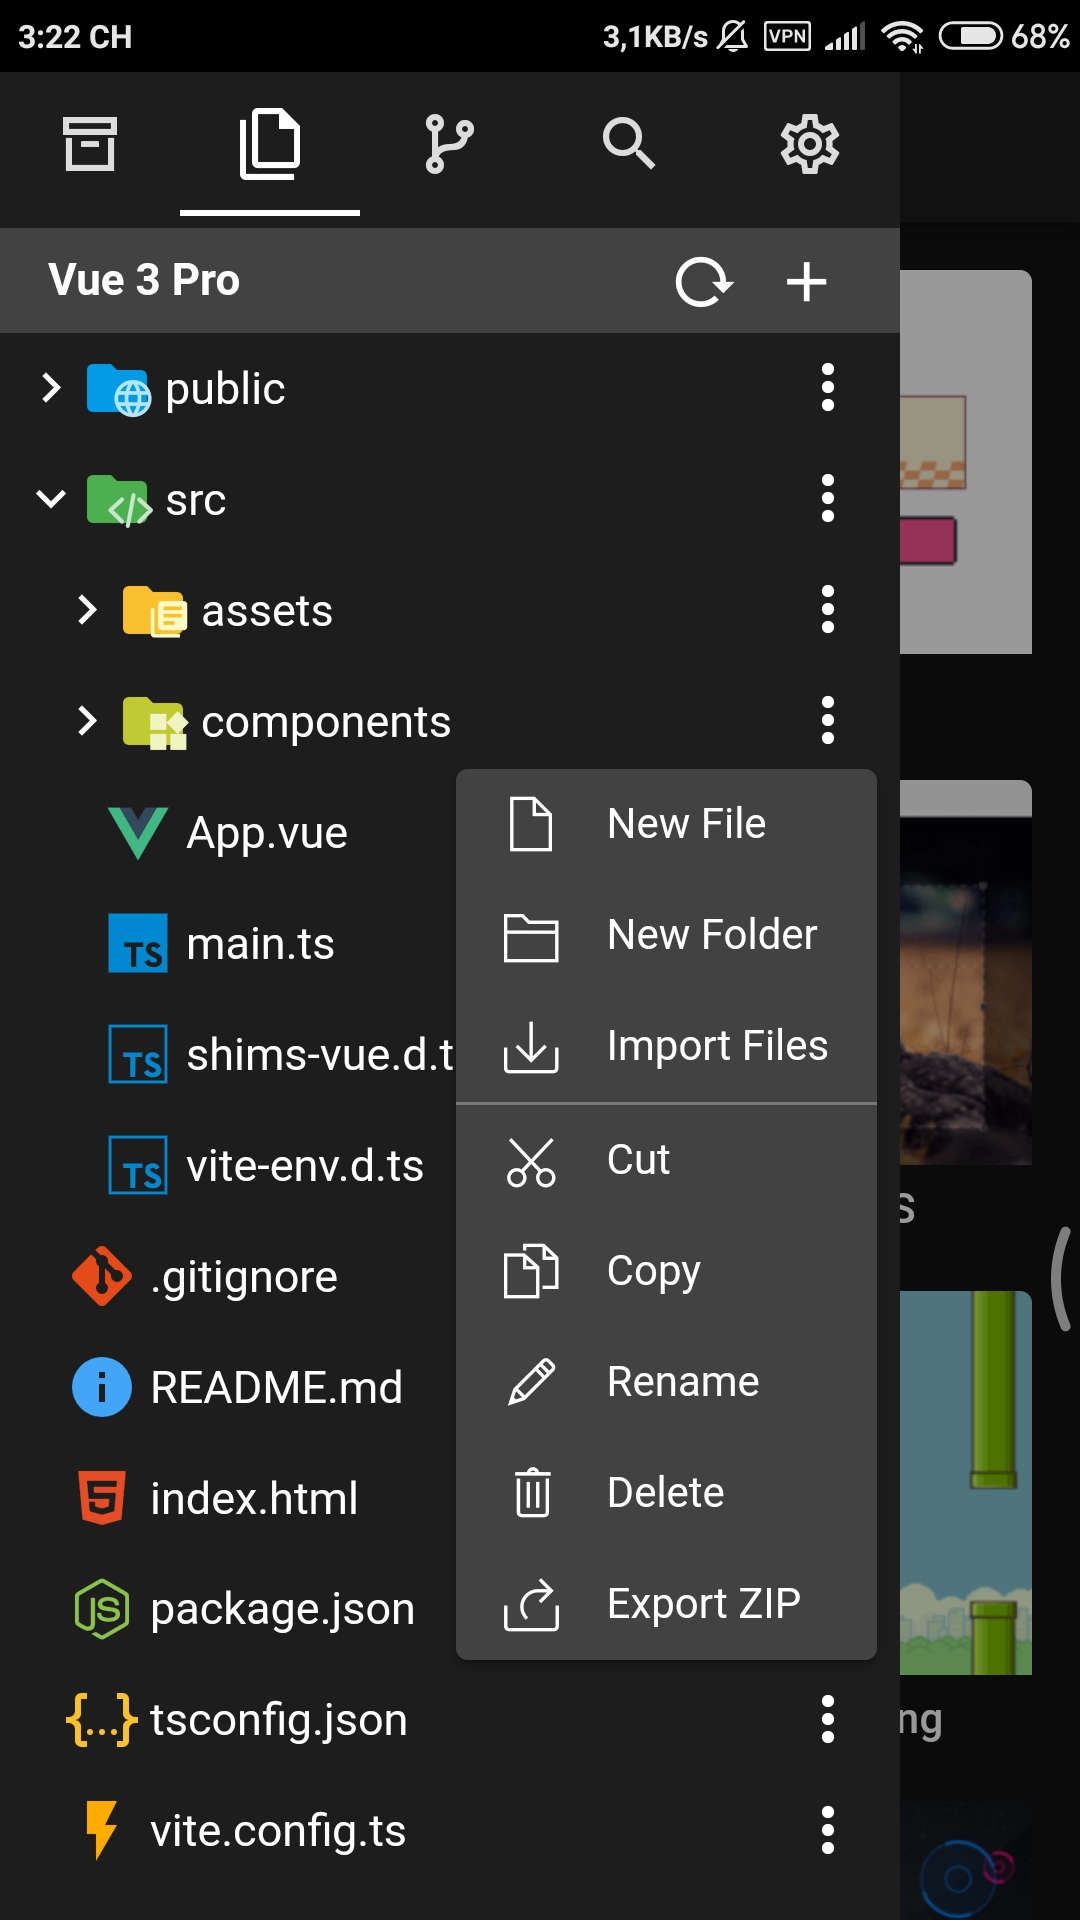
Adding Files
File
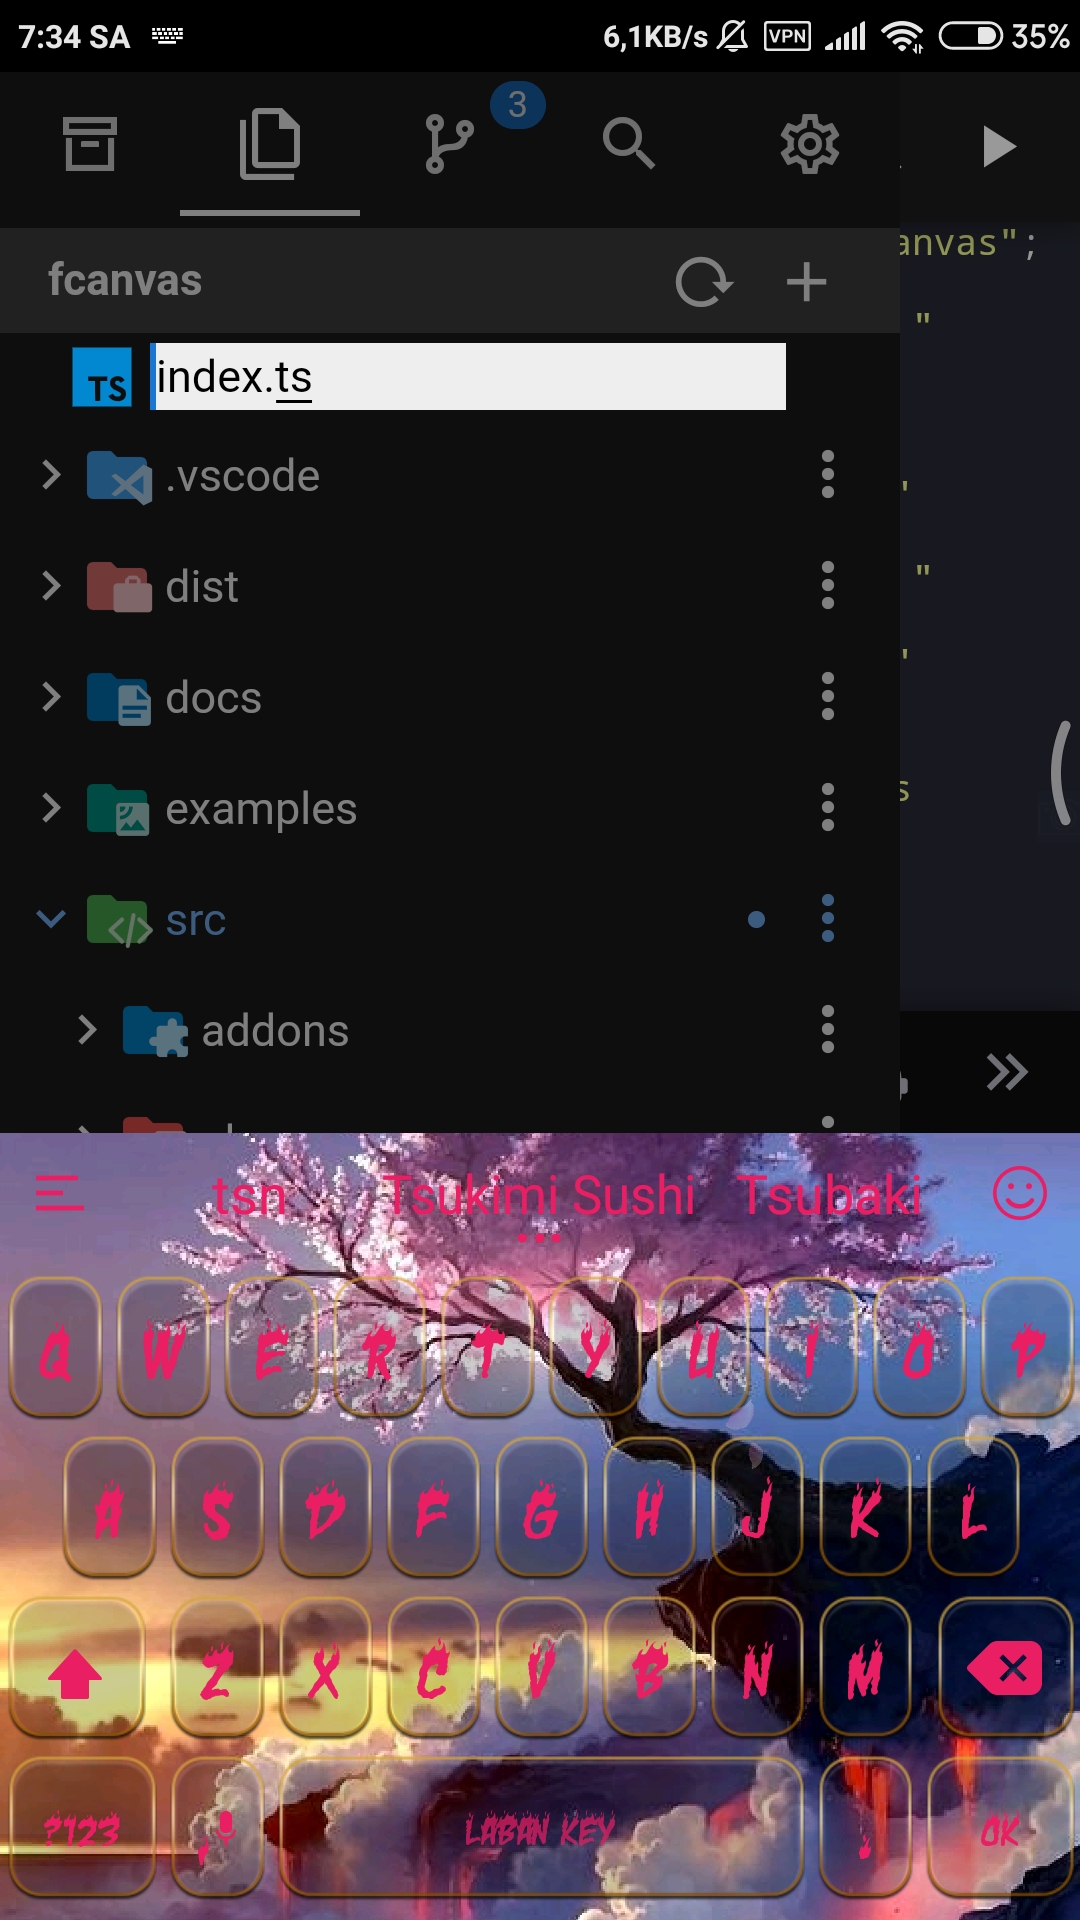
To create a new file you need to have created and open a project first. To add a file to the project, follow the steps below.
Open the File tab menu, click the + icon and select New File.
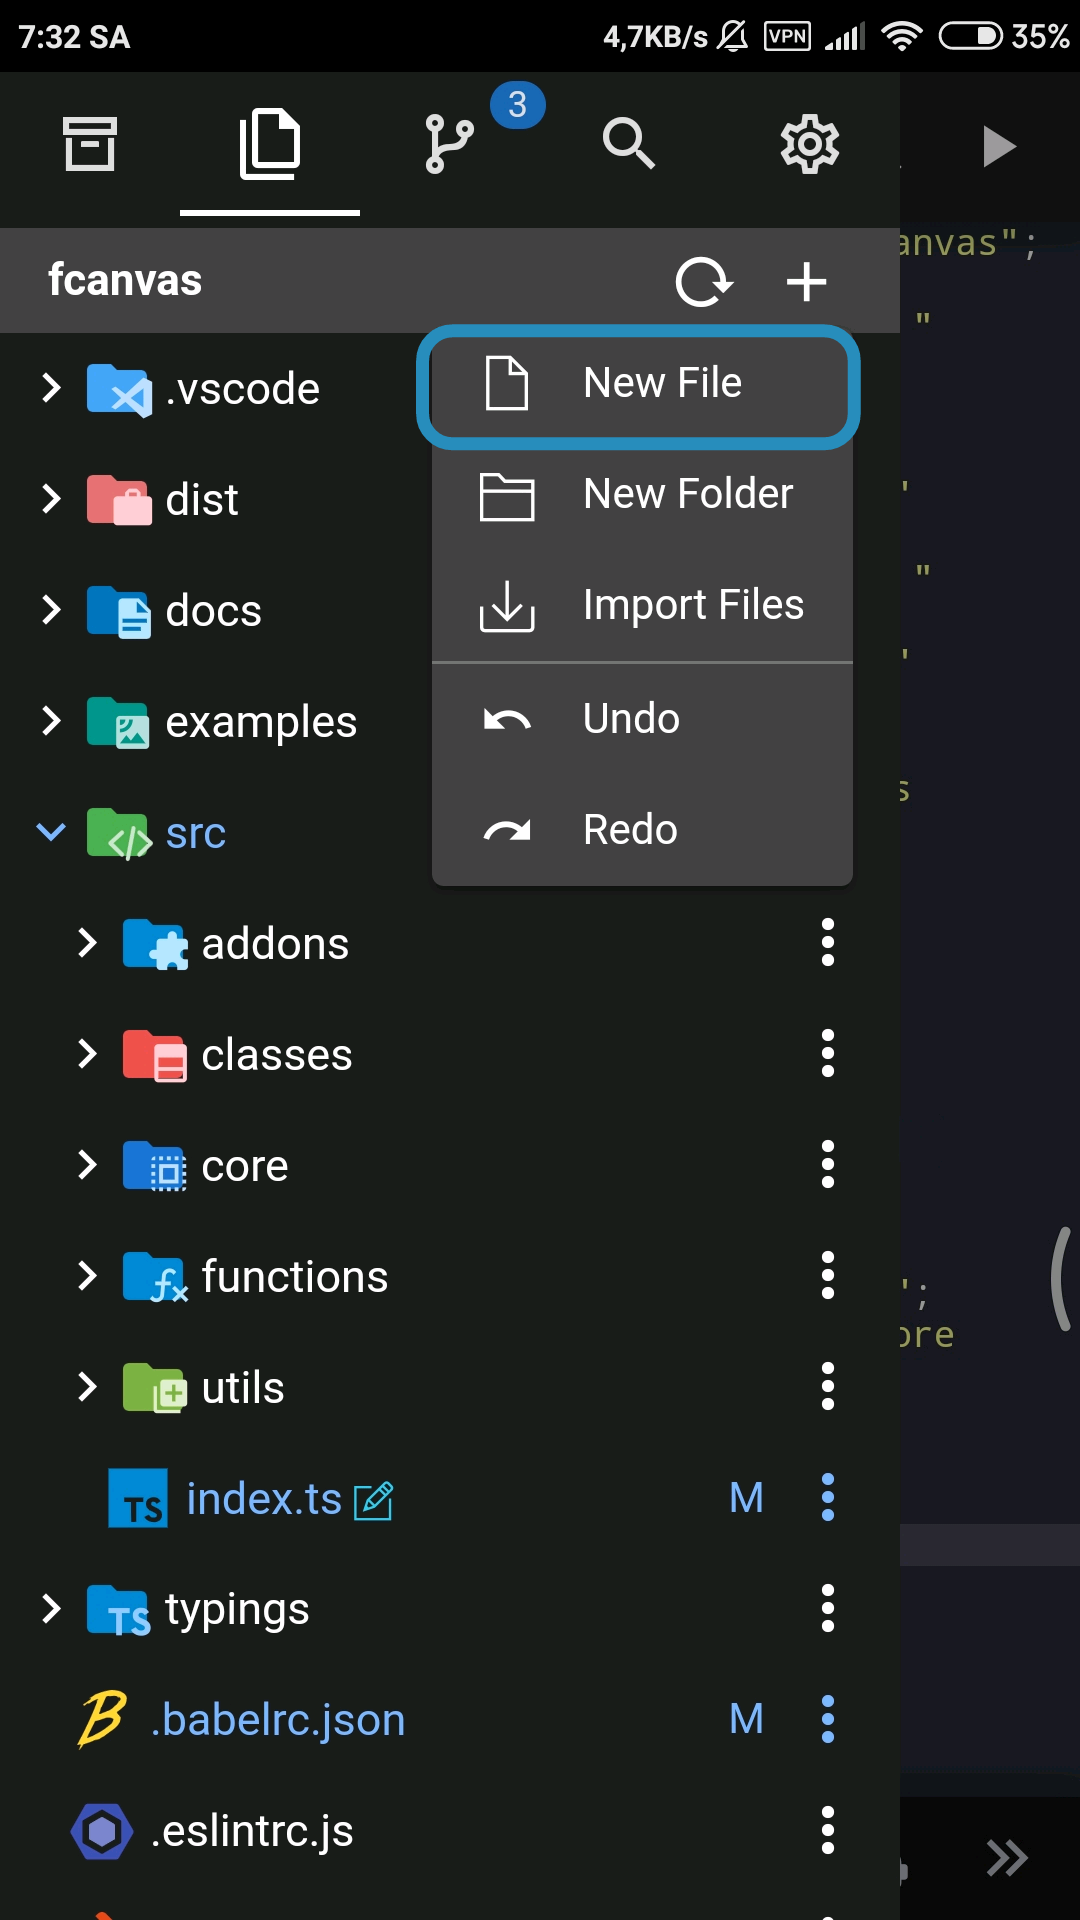
Enter a file name or file path into the prompt and press "OK". File paths use '/' as the path separator.
Folder
To create a new folder you need to have created a and opened a project first. To add a folder to the project, follow the steps below.
Open the File tab menu, click the + icon and select New Folder.
b. Alternatively, you can right click the folder you want to create folder under. This will open up the following menu:
Enter a folder name or folder path into the prompt and press "OK". If the folder path's directory does not exist, then the directory will be created automatically.

Upload Files
You can choose existing files on your device to upload to your project. To upload a file you need to have created a and opened a project first.
Open the File tab menu, click the + icon and select Upload File.
b. Alternatively, you can right click the folder you want to upload under. This will open up the following menu:
Select the file that you want to upload. After selecting, the file should appear under the folder you selected or under the project root folder.
Previewing
The editor allows for previewing of HTML pages and Markdown files. Additional file types and languages are planned to be supported in the future.
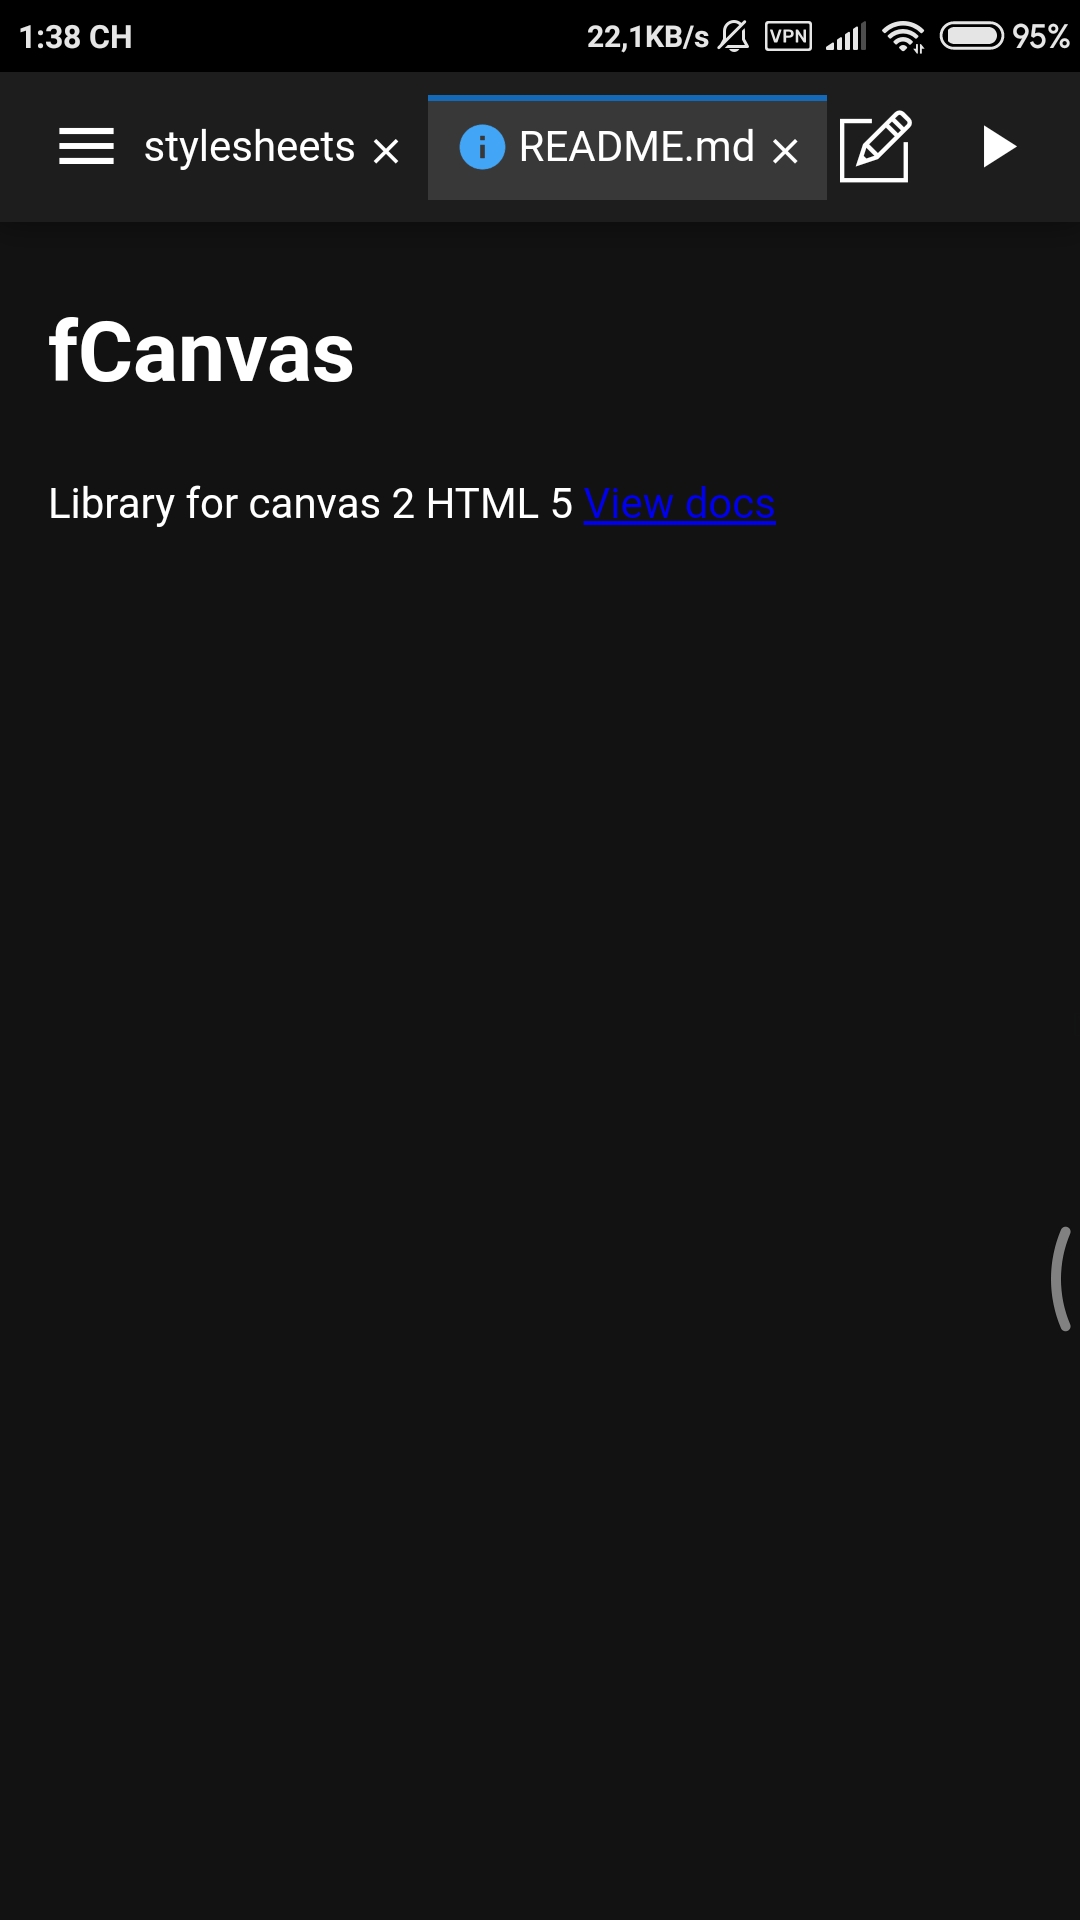
Preview Markdown
Previewing markdown .md files can be done following the steps below.
Click on the Menu icon next to the file and select Preview option.
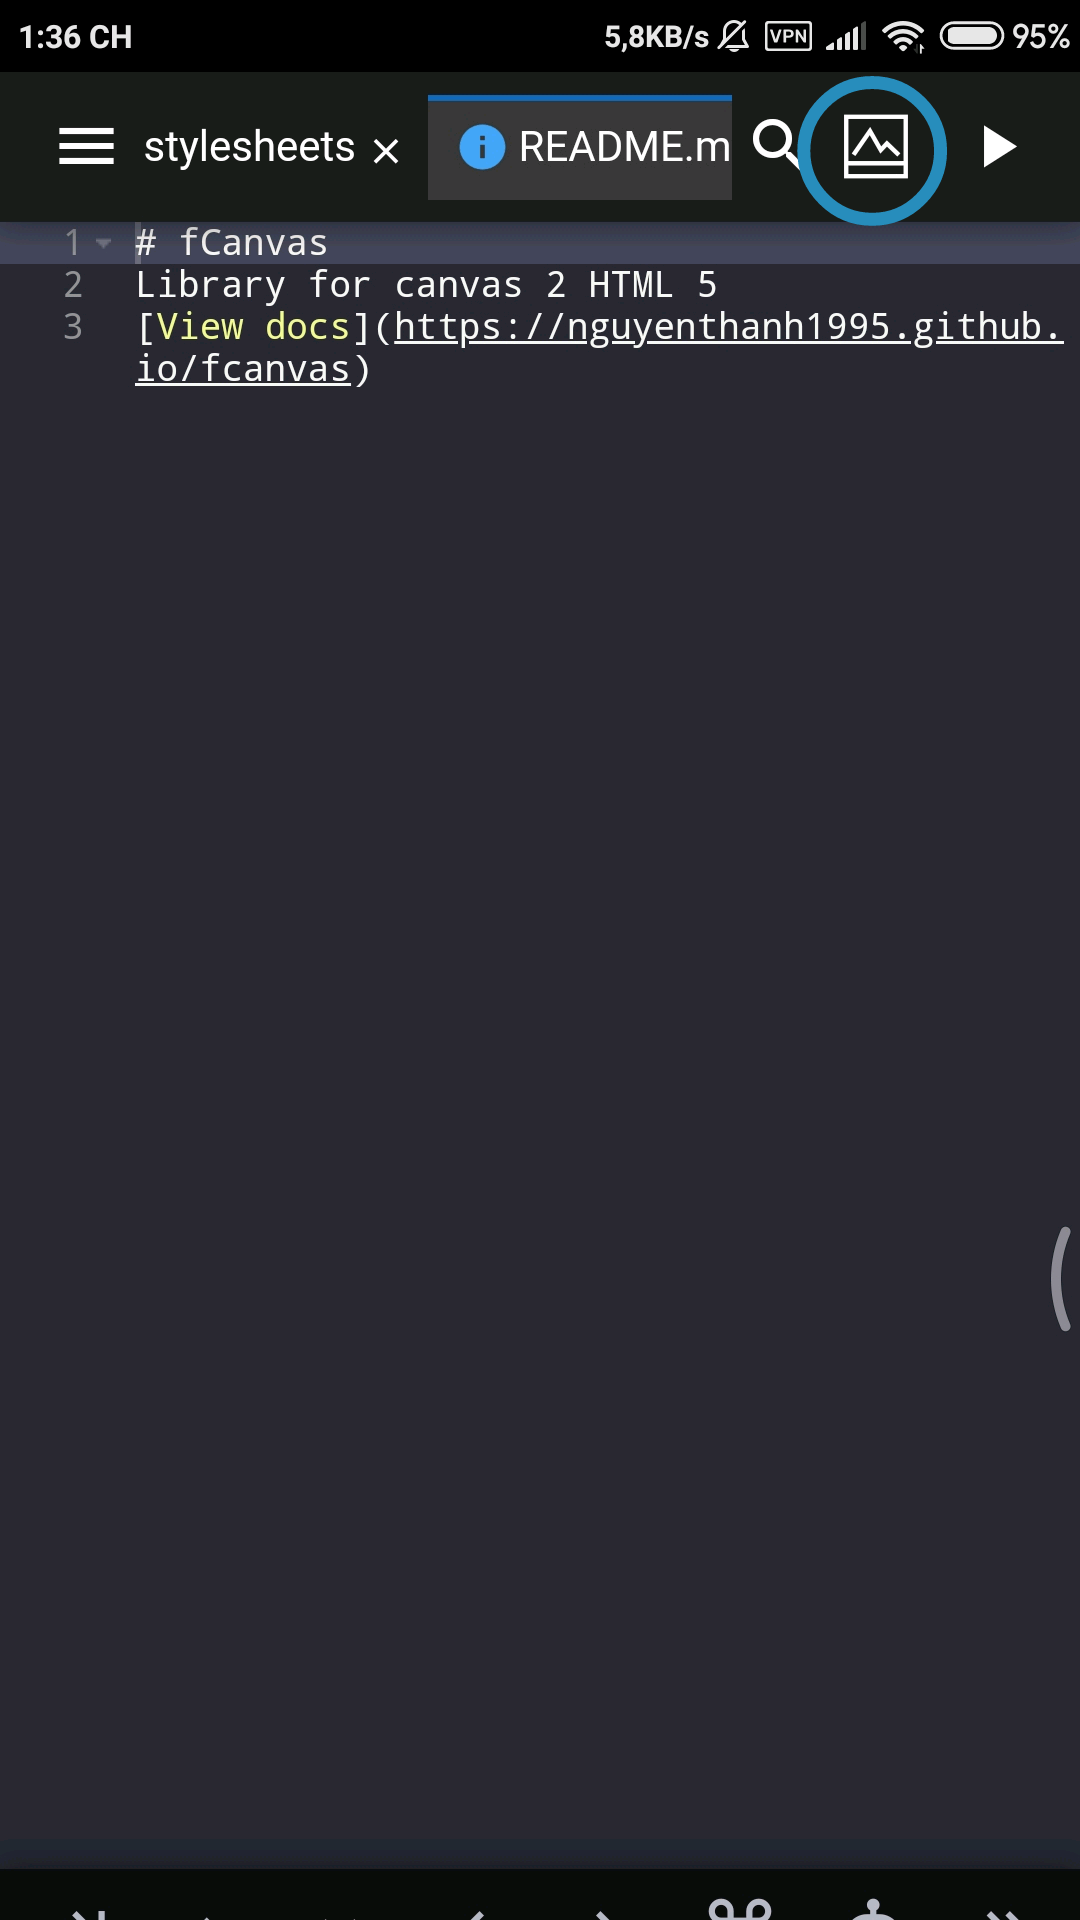
Preview of the Markdown file, shown in the editor view.
Preview HTML
Previewing HTML .html is the default when you click the Play ▷ button. By default, the project will preview the current HTML file (one being edited) before looking for any index.html in the project root. The priority of the HTML file to preview is as follows:
- Current Editing HTML File
- Default HTML File (See Setting Default Launch File)
- Any
.htmlin the project root - Any
.htmlin subdirectories
To preview HTML files on mobile, click the Play ▷ button in the main view:
![]()
Default Launch File
It WebServer httpd
Files
These are more advanced features that will be covered for Wecde. For the basics, please visit the section above on Creating a Project, Adding Files, and Previewing.
Cut/Paste Files
If you need to move files between folders within a project, then use the Cut & Paste feature. To Cut & Paste a file or folder, follow the steps below.
Moving File
To move files or folders within a project, you can use the Cut/Paste method described above. To move files outside of the project to another project, you can use the "Copy to..." feature and then deleting of the file after successfully copying.
Duplicate File
You can also duplicate files using the technique described above in Moving File. Simply use the Copy to feature on the same project to create a duplicate of the file or folder.
Editing
There are various editing features that are not covered in this section that can be found in the Editor Settings page. For example, switching to using real Tab characters or showing invisibles can be managed through the Editor settings.
This section covers some basics as well as some useful, but perhaps hard to find features of the editor such as Code Formatting, and jumping to the Next Error.
Arrow Keys
The arrow keys offer the useful way to navigate code. The arrow keys are part of the Touch keyboard that is available on mobile devices. On iOS the Touch keyboard placement is at the top of the screen to prevent being covered by the software keyboard.
The arrow keys also provide useful navigation function when using autocomplete. Simply use the the Up and Down arrows to change Autocomplete selection and use the Tab key to complete it.
![]()
Emmet Key
Emmet is a shorthand syntax to reduce typing when editing HTML or CSS files. Emmet tries to emulate CSS selector syntax, a brief guide on Emmet can be found here https://docs.emmet.io/cheat-sheet/.
Copy/Paste
Copy and Pasting can be done in 2 ways. One way is to use the Touch Keyboard extra section. Click on the >> Key on the Touch Keyboard to access additional keys for Copy & Paste.
To select text, use a long press to begin selection. You can use the cursor keys provided with the selection to adjust the selection. An action bar will appear with keys to Cut and Paste.
Go to Next Error
From the extra section of the Touch keyboard (To access click on the >> Key) there is the useful feature to jump to the next syntax error in the file. To use this feature follow the steps below.
From the Touch Keyboard, click the + key to expand additional features.
Click Next Error to jump to the next syntax error that the editor finds.
Autoformat/Reformat Code
The extra menu in the Touch keyboard also provides the option to reformat the code using jsbeautify. This reformatting works for all HTML, CSS, JS files. See the example below on using this feature.
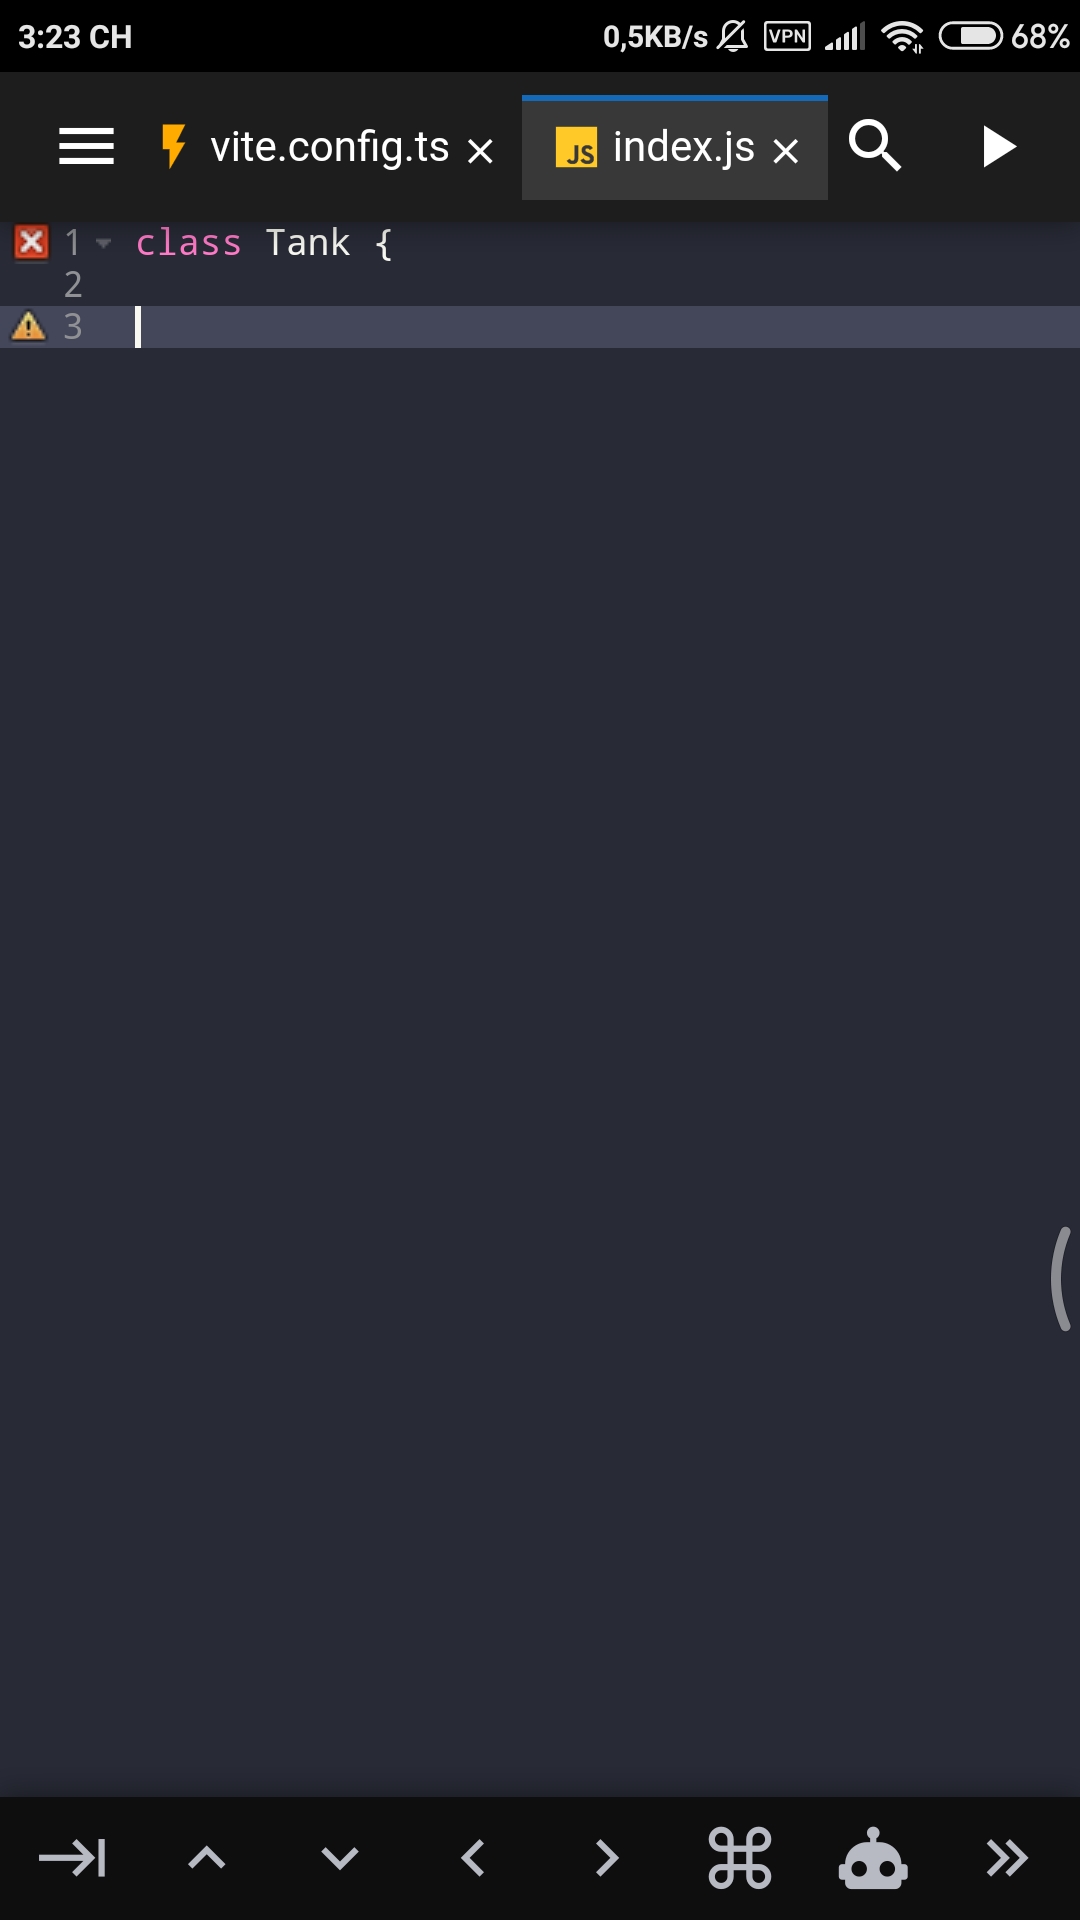
Viewing Syntax Errors
Within the line number gutter, there will be icons to show syntax errors, warnings, or bad practices. To access the information reported by the syntax validation feature, click on the icon to see the message. Please note that both the Autocomplete/Check Syntax and Line Number settings must be enabled to use this feature. See Editor Settings for more details.
Diff Editing
The diff editor is only available to projects using a GIT backed repository. For information on how to create a GIT repository, please visit the GIT Guide page.
Toggle Code Folding
When using the diff editor, parts of the code that are not changed will not be highlighted. For long sections of the code that are not changed and are not important for the purpose of comparing changes, they are hidden (folded) by default. To see the lines of code hidden, click on the "Toggle Fold" text above certain lines to expand and collapse the hidden code.